Set up the development environment
What you need
Before proceeding, make sure you have the following available on your machine:
-
Java 17 or later. Install OpenJDK from adoptium.net , for example.
-
Apache Maven 3.8 or later. Install from Maven download site .
-
Visual Studio Code. Install from its website .
-
The latest map.apps distribution. Download from con terra .
Step 1: Get map.apps for Developers
map.apps for Developers is the development project template for map.apps. It is contributed by con terra and provides a project setup that makes it easy to get started with map.apps development.
-
Download the latest map.apps for Developers project source code release from GitHub .
-
Check that the version of the downloaded zip file matches the version of the map.apps distribution.
Otherwise, download a matching version of map.apps for Developers from GitHub . -
Extract the downloaded zip file into a folder where you have write permissions.
As an example, we will useC:\Users\a.millerin this guide, so after extracting the zip file, map.apps for Developers is available inC:\Users\a.miller\mapapps-4-developers-<version>.
Step 2: Install map.apps libraries
To build map.apps for Developers you will be using Apache Maven. When building, Maven requires access to libraries that come with the map.apps distribution zip file.
To make the map.apps libraries available to Maven, follow these steps:
-
Extract the map.apps distribution zip into the folder
C:\Users\a.miller. This will create the folderC:\Users\a.miller\map.apps-<version>. -
In the Windows command prompt, navigate into the folder
C:\Users\a.miller\map.apps-<version>\sdk. -
Execute the command
install-maven-libs.batto install the required libraries.
For Linux users, execute theinstall-maven-libs.shscript located in the same folder.
When run successfully the output of the command ends like this:
C:\Users\a.miller\map.apps-<version>\sdk>install-maven-libs.bat
Checking for Maven installation... OK
Detecting Maven local repository path. This can take several minutes... OK

Ready to copy libraries to "C:\Users\a.miller\.m2\repository".
-> Press 'y' to continue, 'n' to abort: y
Copying map.apps libraries to Maven local repository... OK

Successfully installed map.apps libraries.

C:\Users\a.miller\map.apps-<version>\sdk>
Now everything is prepared and we can start working with map.apps for Developers.
Step 3: Initialize map.apps for Developers
-
Start Visual Studio Code (VS Code).
-
In VS Code click File → Open Folder and open
C:\Users\a.miller\mapapps-4-developers-<version>. -
When you open the project for the very first time, you need to initialize it. You can skip this step if you initialized it in an earlier session. If unsure, just initialize the project without further worries.
Initialize the project by clicking Terminal → Run Task → Initialize from VS Code’s top-most menu. Alternatively you can press Ctrl+Shift+B and select Initialize to get the same result.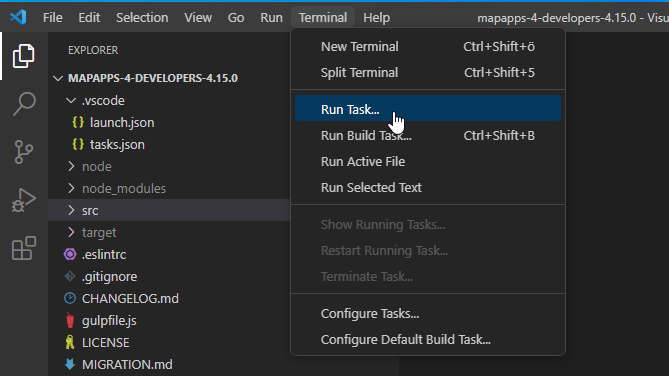
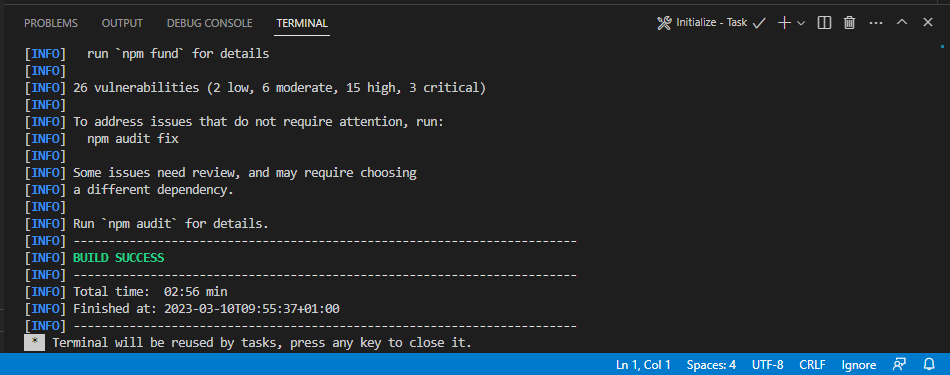
The task will open a terminal and take some time to finish. When the task is done, the terminal reports a successful build like this:
Now everything is ready to run map.apps for Developers.
Step 4: Run map.apps for Developers
-
Build and run the project by clicking Terminal → Run Task → Run from VS Code’s top-most menu. Alternatively you can press Ctrl+Shift+B and select Run to get the same result.
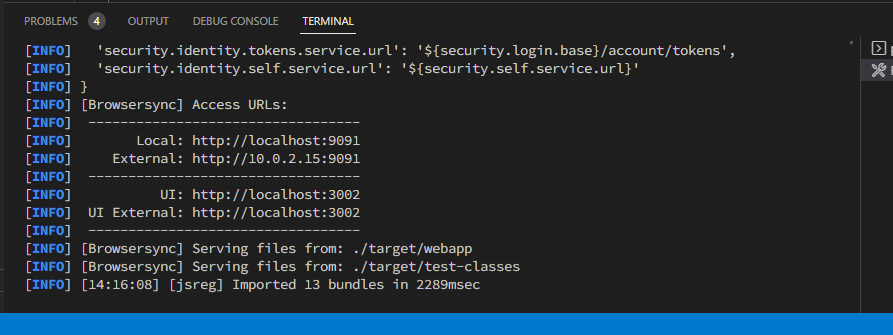
When launching the first time, Maven downloads all required external libraries. This can take several minutes. When ready the VS Code Terminal states:
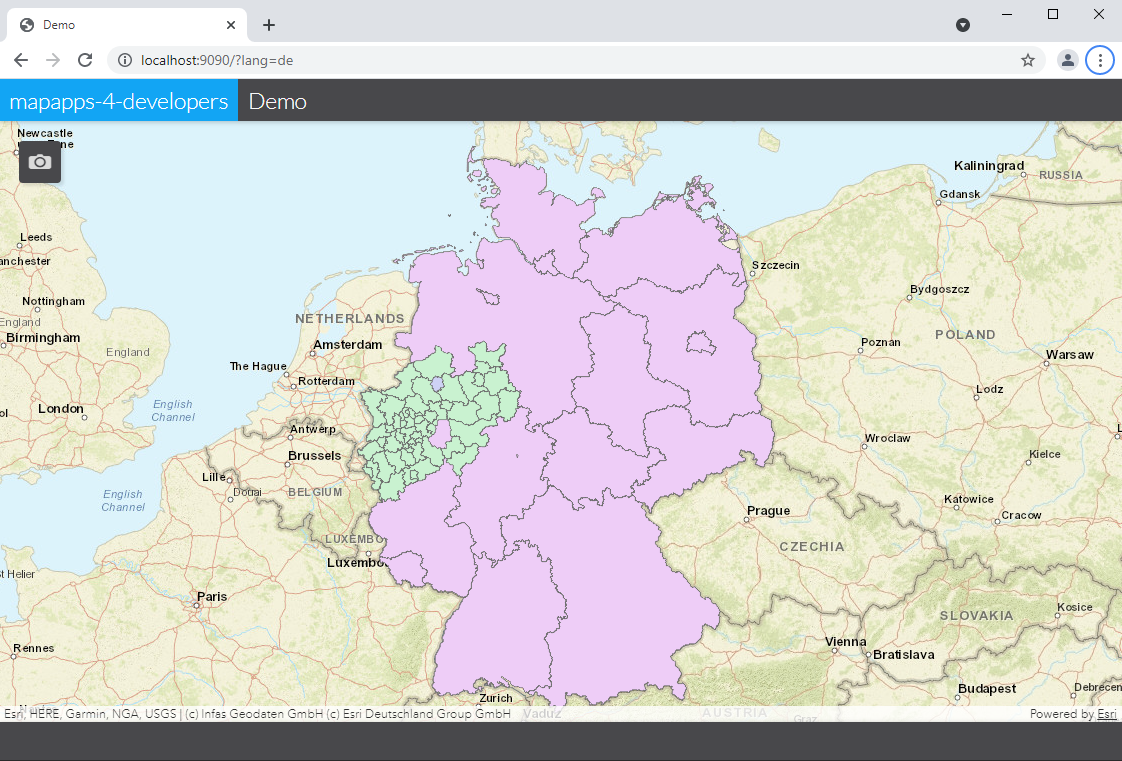
The browser will automatically open the "Demo" app:
Step 5: Make some changes
Now that we know you have a working setup, let’s change something in the source code and see how it is reflected in the browser.
| Developing and debugging map.apps projects is more fun with a Chrome-based browser like Google Chrome or Microsoft Edge. We assume that you are using one of these in the following chapters. |
First we will add some elements to the camera control widget (it’s a small window actually) that is displayed when you click the camera icon in the top left corner of the map.
map.apps for Developers comes with two versions of the camera control widget.
The bundle in folder sample_camera is implemented in TypeScript.
Whereas the bundle in folder sample_camera_js is implemented in JavaScript.
We will make changes to the Typescript bundle in this tutorial.
Let’s add a little divider below the coordinates section.
-
In the VS Code explorer navigate to src > main > js > bundles > sample_camera > CameraControls.ts.vue. This file defines the camera control widget. Add a
<hr>tag below theposition-viewerelement and save the file like this:<v-layout column> <!-- fixed widget header section --> <v-flex shrink class="camera-widget__header" > <position-viewer v-if="latitude !== undefined && longitude !== undefined " :latitude="latitude" :longitude="longitude" /> <hr> <view-mode-switcher v-model="viewmode" /> </v-flex> -
Switch back to the browser and reload map.apps for Developers. After the app loaded click the camera icon in the top left corner of the map to display the camera control widget.
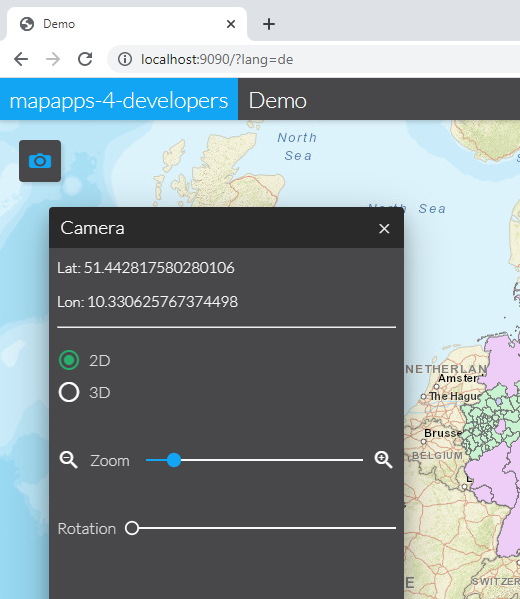
What a beautiful line that is!
✅ Now that your development environment is set up and you successfully modified existing code, we can take the next step and extend map.apps with a new feature. The next chapter Your first bundle demonstrates how to add new functionality to map.apps from scratch.