Spatial restriction
In this tutorial, you will learn how to restrict the access to a subset of features based on their location. You will restrict the access to the Cities (0) layer to cities in the United States.
This tutorial was tested for ArcGIS Enterprise 11.5 in December, 2025.
Prerequisites
Check the preconditions for this tutorial:
-
security.manager NEXT is installed.
-
You have access to two user accounts:
-
An administrative user account to administer security.manager and Portal.
-
A non-administrative user account to test the access.
-
-
You can use the service SampleWorldCities for this tutorial, so you can restrict access to the service.
This tutorial is based on the tutorial Feature restriction, where you allowed authenticated users access to cities with a minimal population of 1,000,000 of the Cities (0) layer for the service SampleWorldCities. The service is shared with the organization. You can do this tutorial separately but keep in mind that your policy file might look different.
Add a spatial restriction
The easiest way to add spatial restriction is to add a template first and then adjust it. You can add templates by pressing Ctrl+Space. This function displays available examples, descriptions, and code snippets.
Add a template
Add a spatial restriction template to the policy of the previous tutorial.
-
Open the permissions editor in the security.manager NEXT Manager UI.
You should now see the permission created in the previous tutorial.
{ "restrictions": { "population":{ "type": "feature", "query": "pop >= 1000000" } }, "policies": [{ "layers": [ "0" ], "roles": ["enhancedSecurity_authenticated"], "restrictions": ["population"] }] } -
Add a comma and a new line after the curly braces at the end of the
populationrestriction. -
Enter
"USA":to create a new restriction called USA. -
After entering the colon, a list of restriction types appears. Select Spatial restriction.
If no list is displayed, use Ctrl+Space to open it manually.
Now you have created a skeleton for a spatial restriction.
{
    "restrictions": {
        "population":{
            "type": "feature",
            "query": "pop >= 1000000"
        },
        "USA":{ (1)
            "type": "spatial", (2)
            "featuretypeurl": "https://myserver:6443/arcgis/rest/services/folder1/service1/FeatureServer/0", (3)
            "featurequery": "state = 'California'" (4)
        }
    },
    "policies": [{
        "layers": [
            "0"
        ],
        "roles": ["enhancedSecurity_authenticated"],
        "restrictions": ["population"]
    }]
}| 1 | The restriction is called USA. |
| 2 | The type of the restriction is spatial. |
| 3 | The featuretypeurl with a placeholder to refer to a feature layer that provides the polygons to be used for the spatial restriction. |
| 4 | The featurequery with a placeholder containing the query that selects those features whose geometry is used as a spatial restriction. |
Adjust the restriction
Adjust the template to filter features that are inside the United States.
-
Configure the spatial restriction:
-
Use https://services.conterra.de/server/rest/services/security_demos/World_Countries/FeatureServer/0 as the
featuretypeurlvalue. -
Use
"NAME = 'United States'"asfeaturequeryvalue.
-
-
Add
"USA"separated by a comma to therestrictionsof the policy.The policy with both feature and spatial restrictions should now look like this:
{ "restrictions": { "population":{ "type": "feature", "query": "pop >= 1000000" }, "USA":{ "type": "spatial", "featuretypeurl": "https://services.conterra.de/server/rest/services/security_demos/World_Countries/FeatureServer/0", "featurequery": "NAME = 'United States'" } }, "policies": [{ "layers": [ "0" ], "roles": ["enhancedSecurity_authenticated"], "restrictions": ["population", "USA"] }] } -
Click Save changes and restart.
You modified the policy so that authenticated users can access features of the Cities (0) layer that have a population of at least 1 million and are located in the US.
Verify configuration
To verify the previous configuration, open the service as a non-admin user in the ArcGIS Online Web Viewer.
-
Open the service metadata of the SampleWorldCities service as non-admin user.
You will see only the Cities (0) layer in the Layers section. -
Click on ArcGIS Online Web Viewer in the View In: section.
You will see only those features with a population of at least 1 million placed in the US.
Clipping
security.manager NEXT supports two clipping options for spatial restriction.
By default clipping is done by security.manager NEXT and called soi-clipping.
The second option is clipping by ArcGIS Enterprise, which is supported for services published from ArcGIS Pro only, and called arcgis-clipping.
Both mechanisms clip the features and symbols along the border of the restriction area. Using SOI clipping, labels might be clipped at the border, too.
For more information, refer to imageoperation section in the policy format reference.
To see the difference between both options easily, add labels to the web viewer.
-
Open the service SampleWorldCities in the ArcGIS Online Web Viewer as non-admin user.
-
Expand SampleWorldCities and click on the layer Cities.
-
Select
 Labels.
 -
Enable labels.
-
Click on + Add label class and select CITY_NAME as Label field.
-
Optionally configure the Label style to better read the labels, like red color and white background.
Your map should look similar to the image.
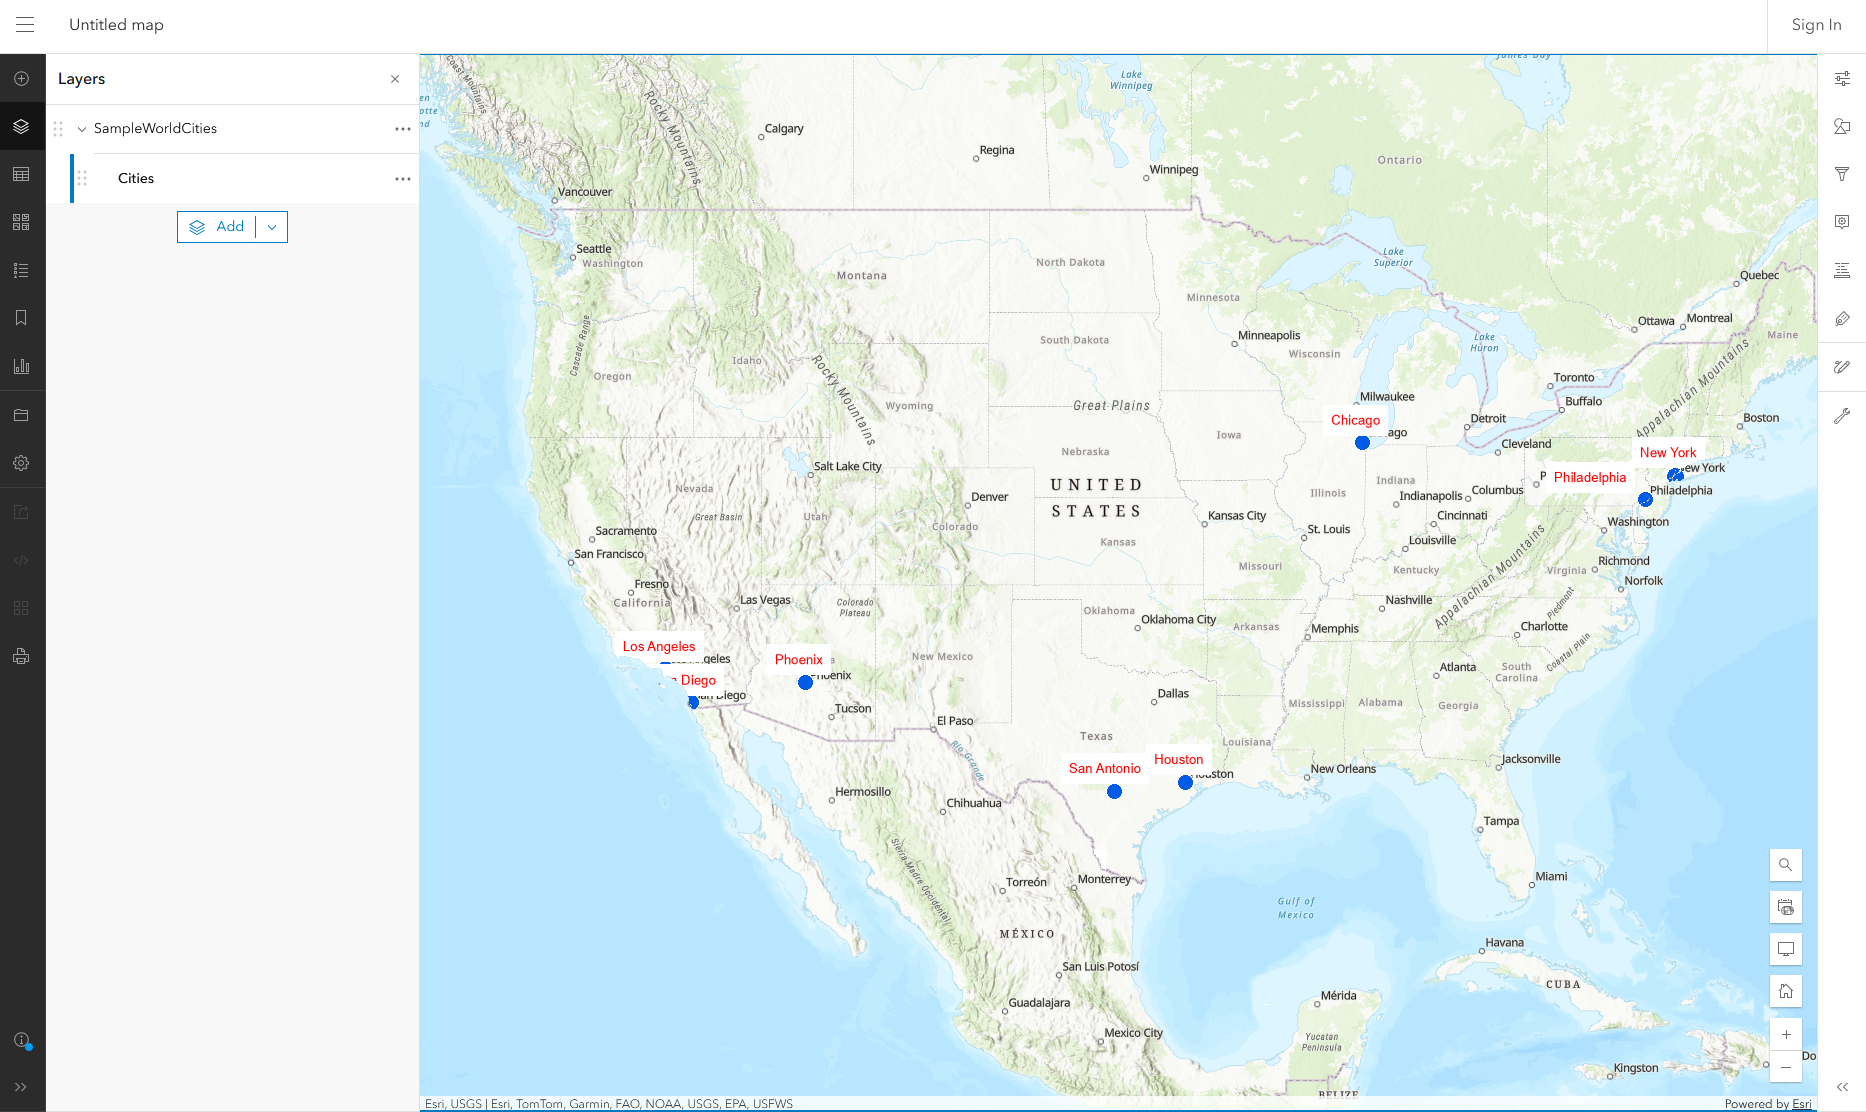
-
Explore the map, especially along the borders of the United States, to see how SOI clipping works. Depending on the zoom level, labels may appear or disappear.
-
Keep the tab open.
Now change the clipping operation.
-
Open the permissions editor in the security.manager NEXT Manager UI.
-
After
"featurequery": "NAME = 'United States'"add a comma and a new line. -
Enter
"imageoperation":and select arcgis-clipping.The policy should now look like this:
{ "restrictions": { "population":{ "type": "feature", "query": "pop >= 1000000" }, "USA":{ "type": "spatial", "featuretypeurl": "https://services.conterra.de/server/rest/services/security_demos/World_Countries/FeatureServer/0", "featurequery": "NAME = 'United States'", "imageoperation": "arcgis-clipping" } }, "policies": [{ "layers": [ "0" ], "roles": ["enhancedSecurity_authenticated"], "restrictions": ["population", "USA"] }] } -
Click Save changes and restart.
-
After the service is restarted, go to the Map Viewer and pan the map to reload it.
You can now see the ArcGIS clipping, where the labels are not clipped at the border.
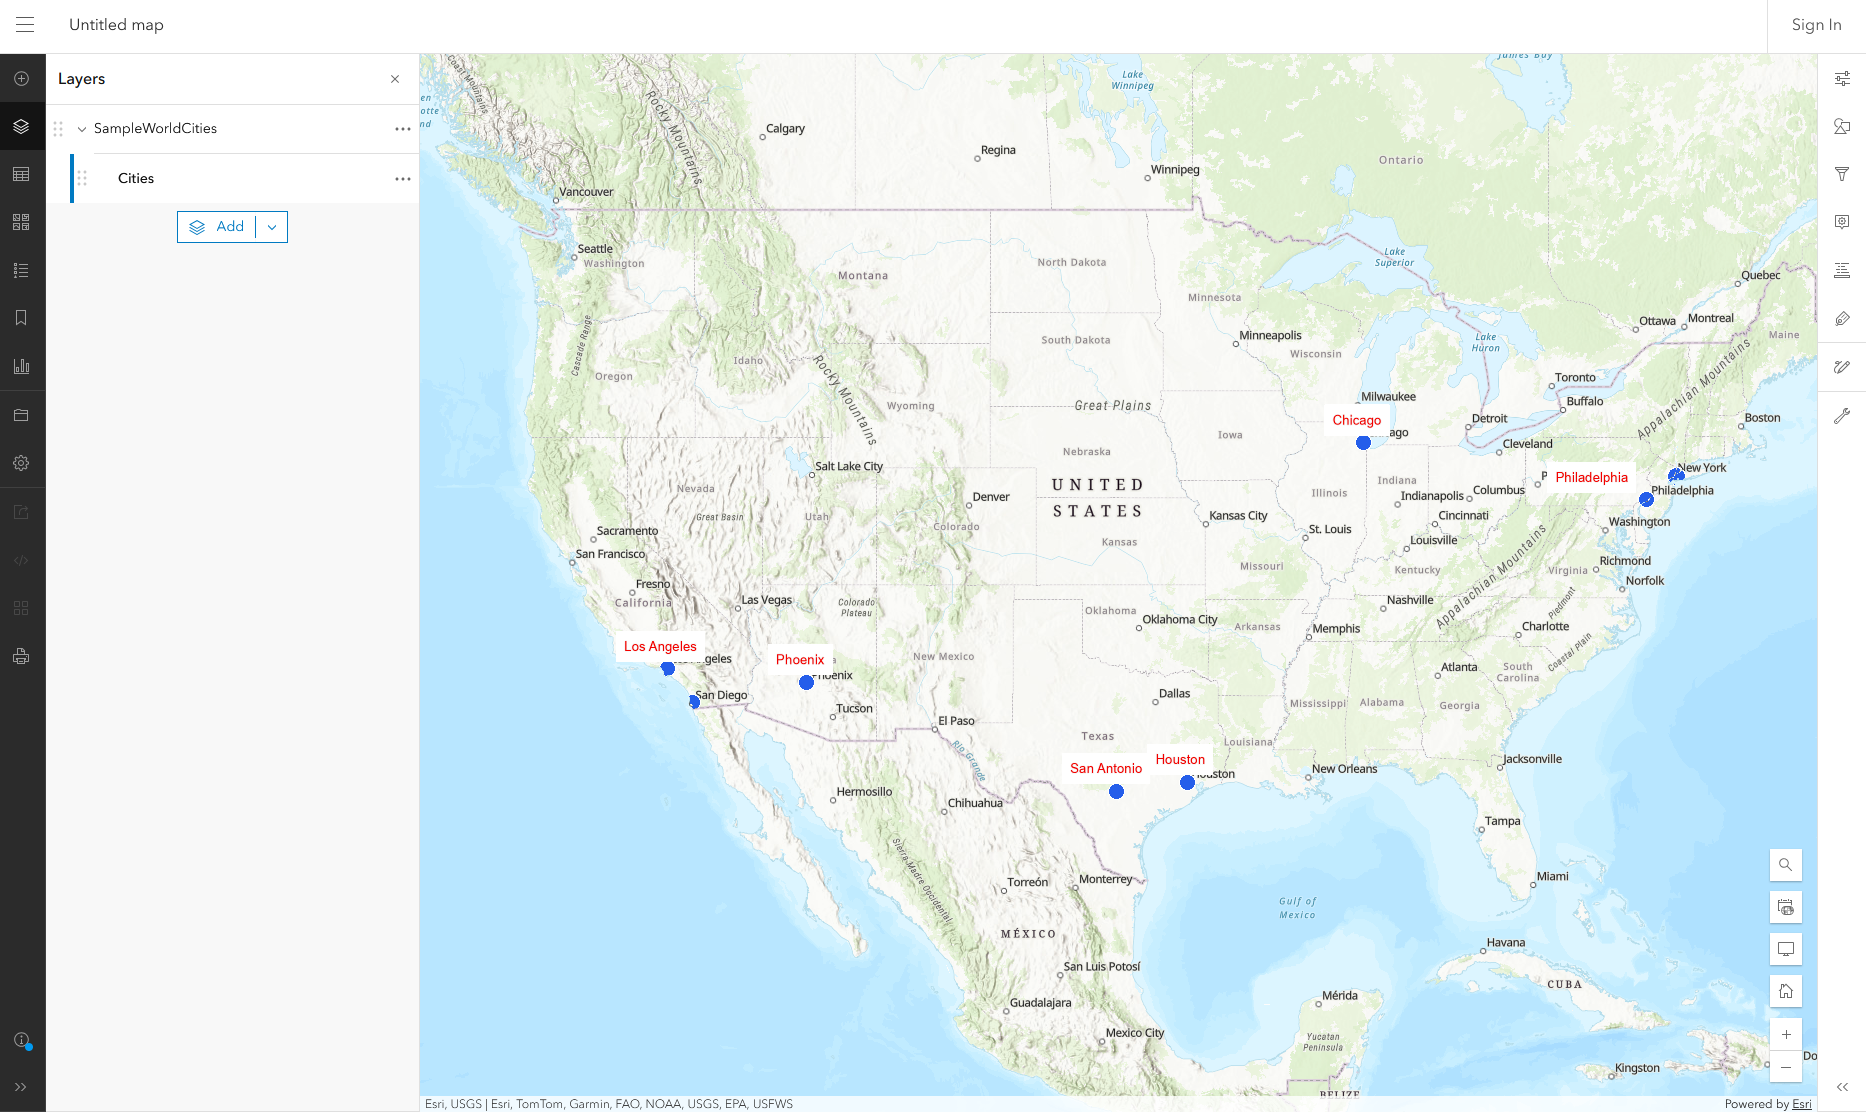
-
Explore the map again, to see the differences to the previous map.
You can see the difference between both clipping operations in the images below.
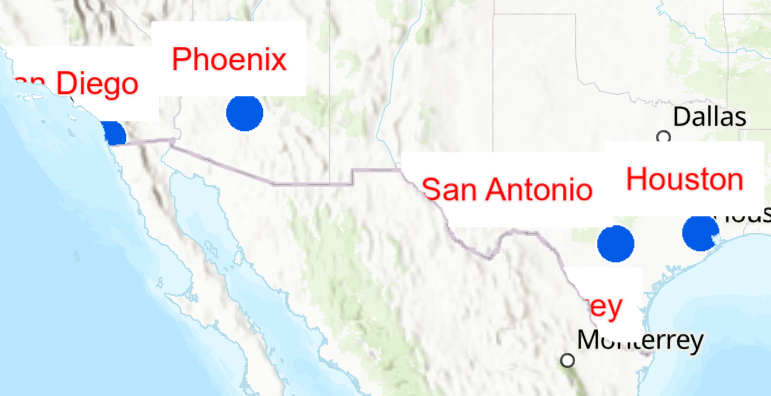
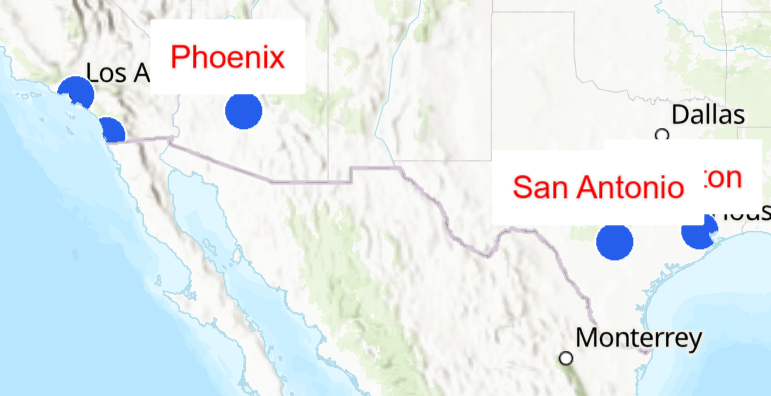
In the first image you can see the default SOI clipping where the labels are cut off at the border. In the second image you can see the ArcGIS clipping where labels are not cut off at the border but some are missing. Changing the clipping method does not change the rendering of the features or symbols.
Summary
In this tutorial, you learned how to restrict access to features of a layer based on the location. You added a restriction to allow authenticated users access to features in the US with a population of at least 1 million of the Cities (0) layer.
For further details, refer to Spatial restriction in the reference.
In the tutorial Field restriction you will learn how to restrict the access to a subset of fields for features.