Usage
map.apps Advanced Editing provides the following workflows for editing geoobjects:
-
Adding new objects (started with a tool)
-
Editing and deleting existing objects, started with
-
a tool
-
an action in a popup
-
an action in the Result Center
-
-
Merge multiple objects (started with a tool)
|
Please also note the configuration options described in map.apps editing. Further information on configuration can be found in Bundle documentation advanced-editing. |
Add new object
To start creating a new object, click on the New Object tool.
In the New Object dialog, select the layer in which the new object will be created.
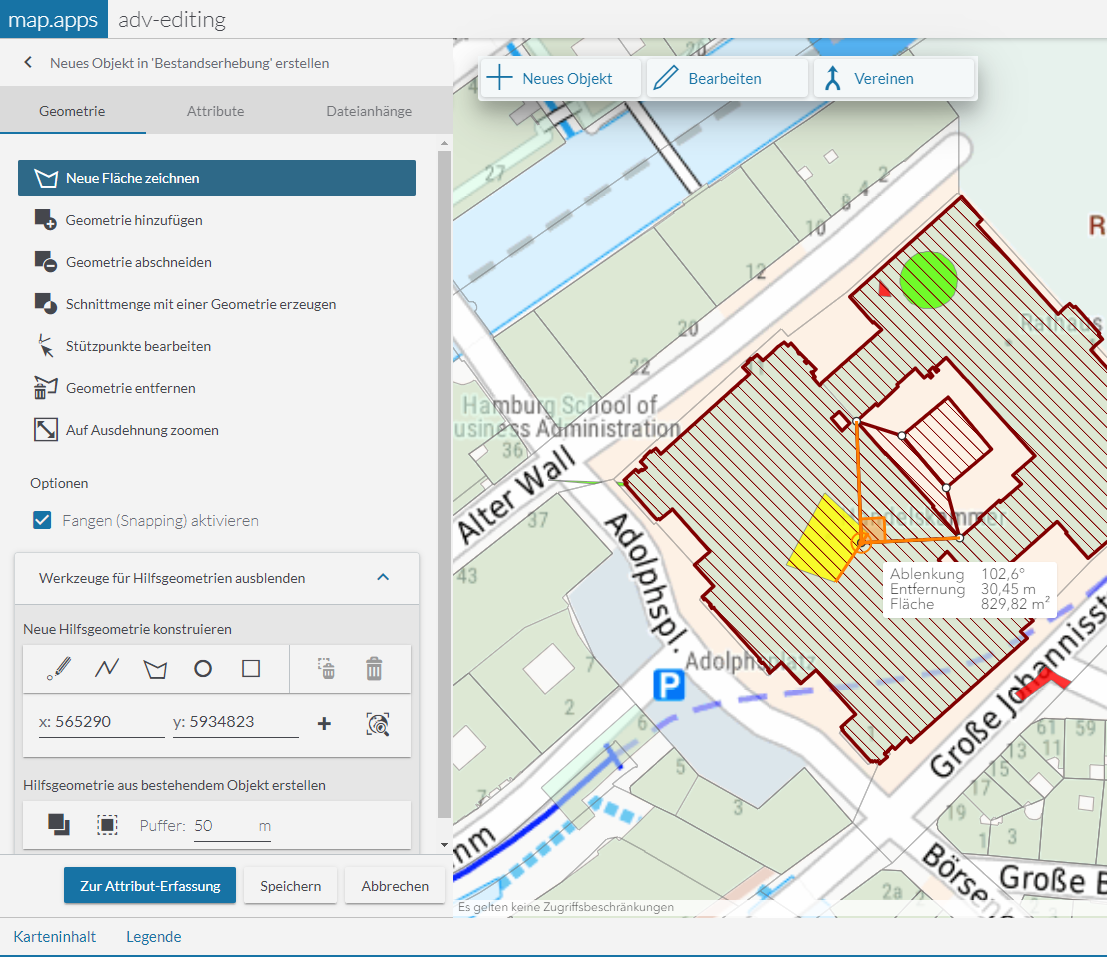
The creation of a new object is usually done in two steps:
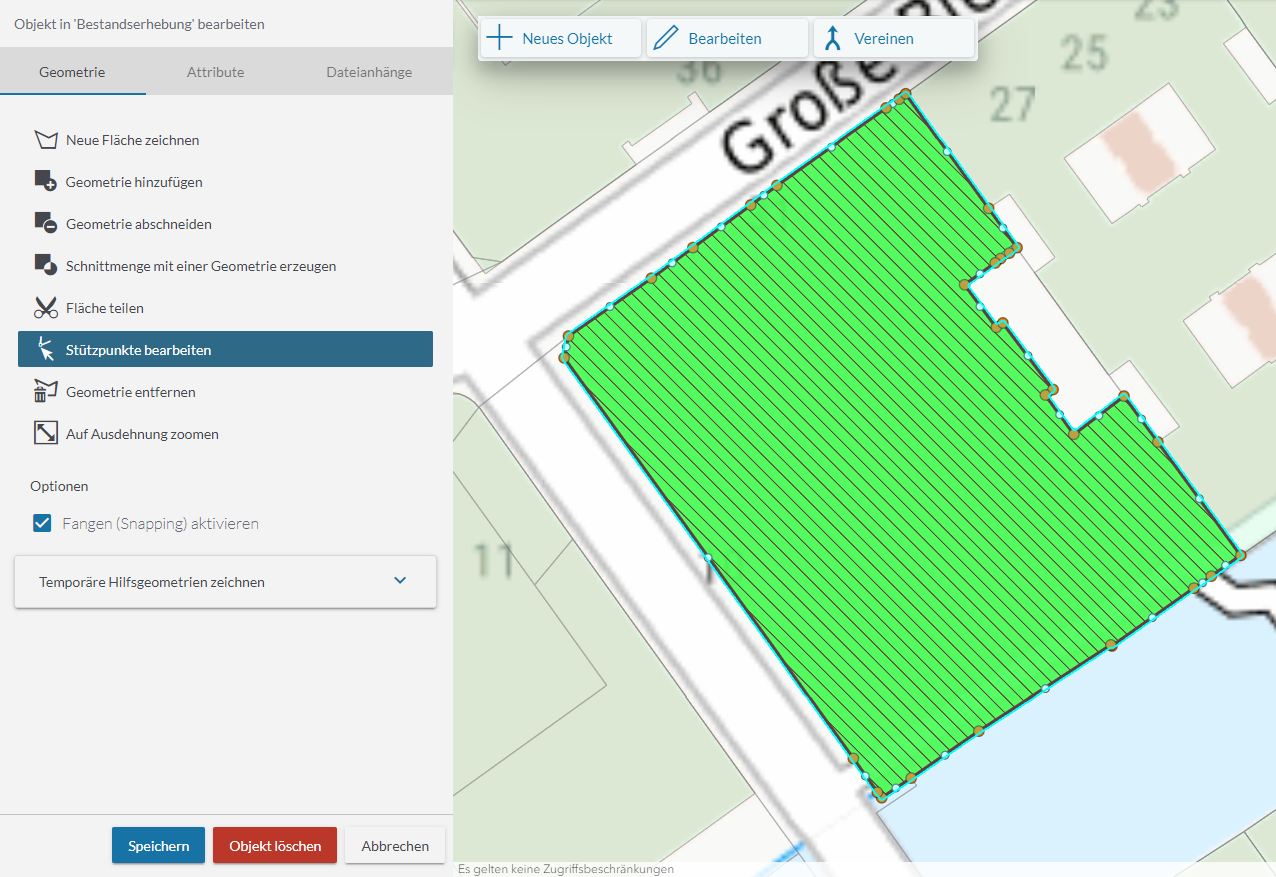
Create a geometry
A new geometry can be created using existing geometries. Select the Add geometry tool and click on objects in the map to use their geometry. The shaded area represents the new object to be created.
Additionally you can expand the Draw temporary helper geometries area (if this is enabled in the app). Here you have the option to draw or construct new geometries, and in turn add or subtract them to your target geometry using the tools in the top bar.
When the new geometry is finished, click Go to attributes to enter attributes.
Edit or delete existing object
Editing of an existing object can be started by different ways. Which of the ways described below are available depends on the respective app configuration.
-
Start via edit tool
To start editing an existing object, click on the Edit tool.Then click on the object you want to edit. If multiple objects are hit with the click, you get a list of the different objects to choose from.
-
Start from a popup
After calling a popup for an object, the editing can be started by clicking on Edit: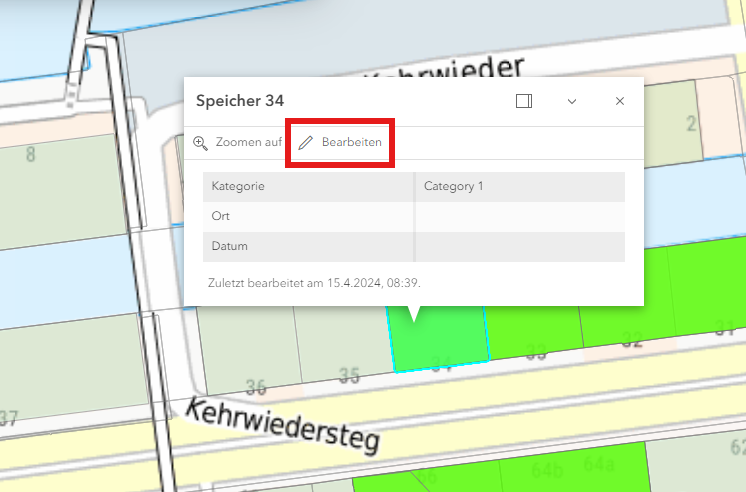
-
Start from the Result Center
After a spatial selection, the editing of an object can be started after selecting a row in the Result Center: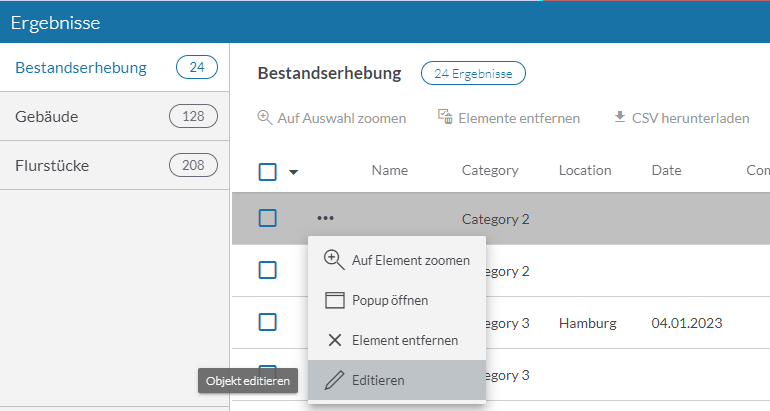
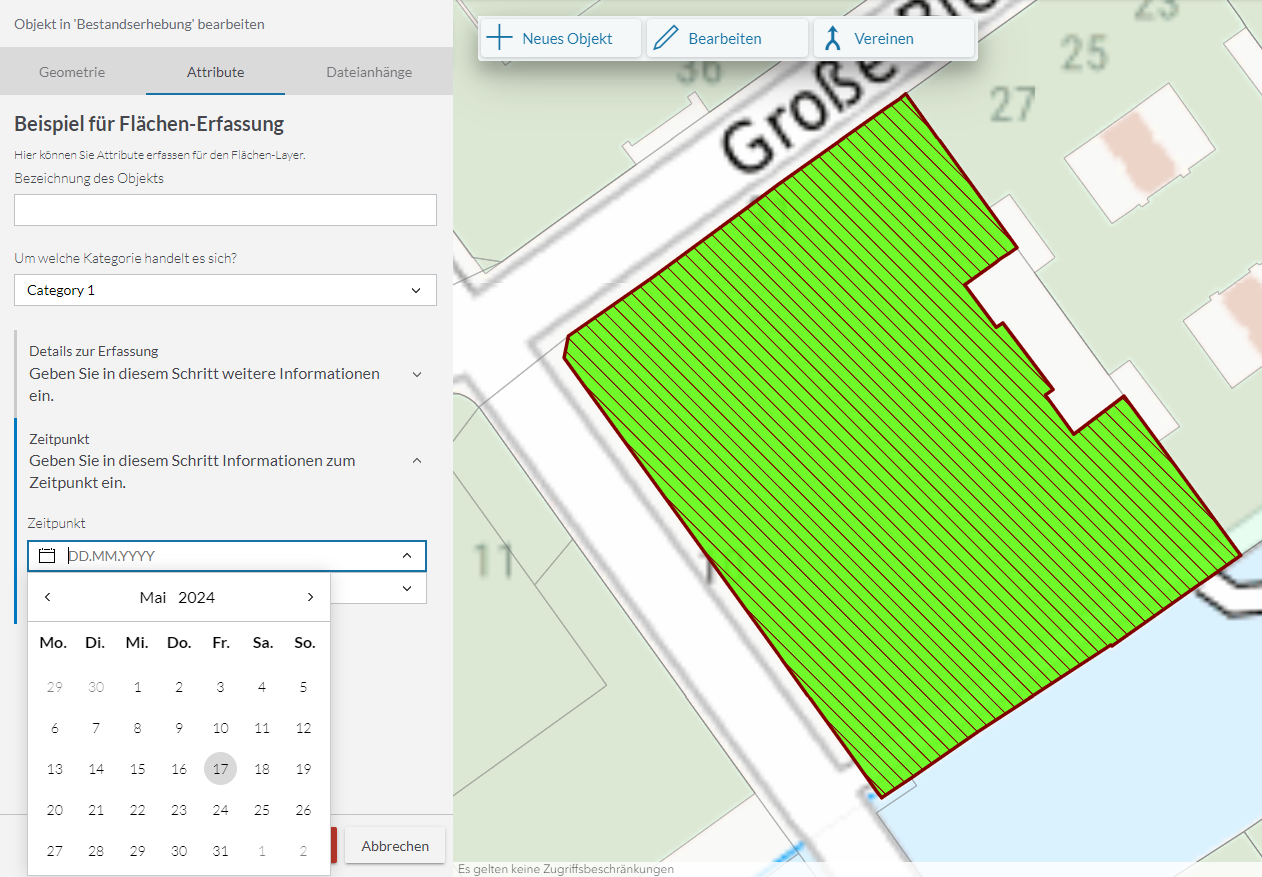
Edit geometry and attributes
In the Geometry tab you can edit the geometry of the selected object (analog to Create a geometry).
In the Attributes tab you can edit the attributes of the object (analog to Enter attribute values).
Delete a single object
To delete an existing object, click the Delete button and confirm the confirmation prompt. This step cannot be undone.

Delete several objects in one step
To delete several objects in one step, proceed as follows:
-
Click on the Spatial selection tool and draw a frame on the map containing all the objects to be deleted. A table with the selected objects is displayed.
-
Select the objects to be deleted from the table.
-
Click on the Delete objects tool.
-
Click on the confirmation prompt to delete the selected objects.
This step cannot be undone.
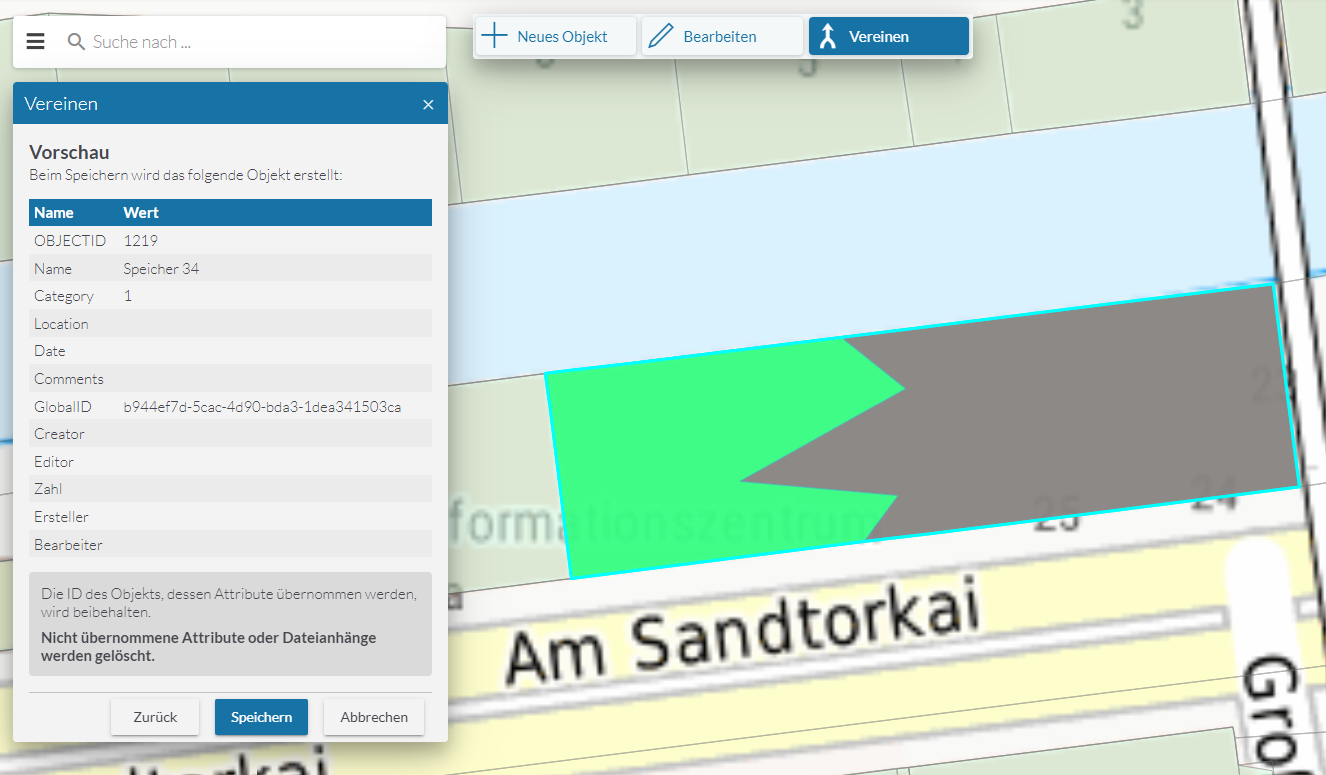
Merge multiple objects
To merge two objects into one, click on the Union tool.
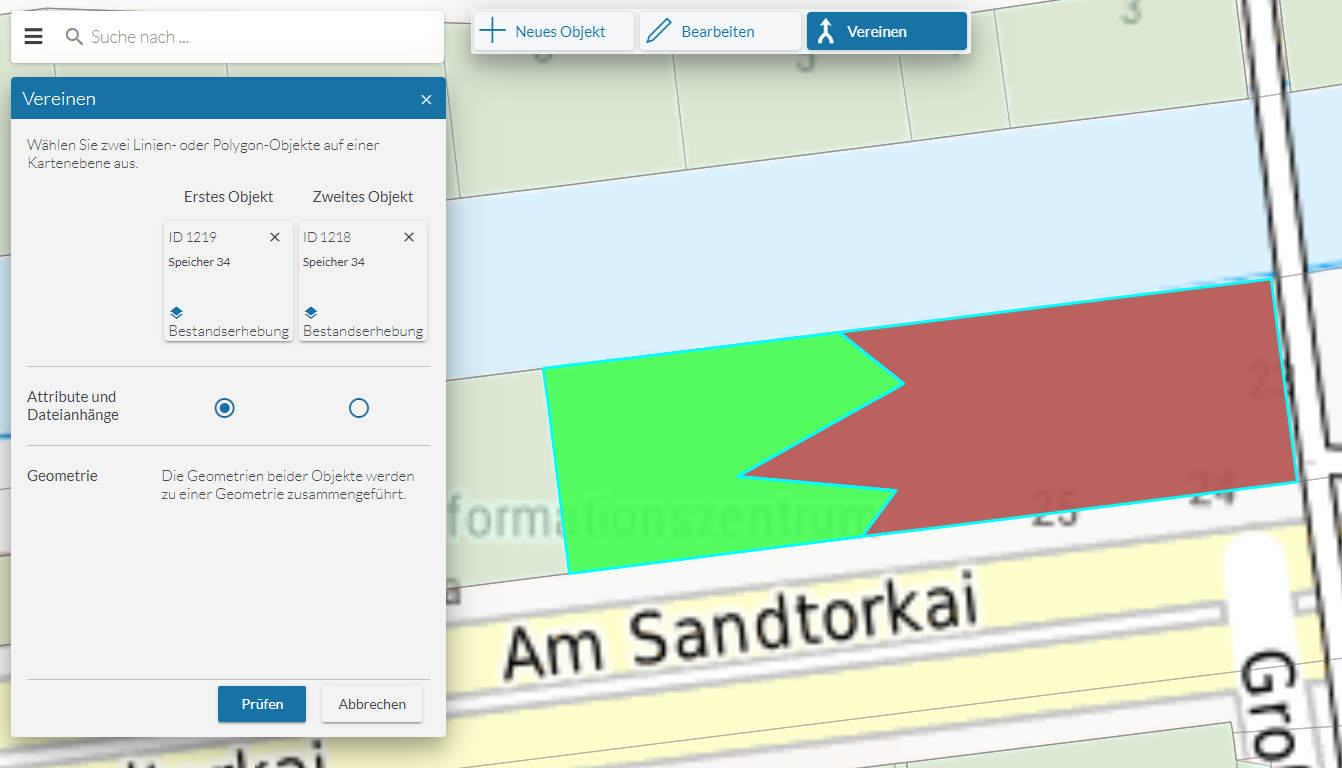
Now select two objects to be merged one after the other by clicking on the map. These objects can be of the type line or polygon. Then determine from which object the attributes and any file attachments are to be used and click on Check.
In the following dialog, make sure that the correct new attribute values are displayed. The values and any file attachments of the other object are deleted.
To complete the merge, click on Save. The new object is saved under the ID of the object whose attributes you have transferred.