Getting started
| This page describes how to set up Visual Studio Code IDE with map.apps for custom development. You might also use other IDEs like IntelliJ or NetBeans. |
If you want to develop bundles for map.apps use the development project provided on GitHub . This project offers extended functionality such as ES6 support or the usage of vue.js and vuetify.js. Furthermore it contains a sample app, a custom bundle showing basic interaction with the map and a customized layout. The project also provides a predefined development web server for local development.
Requirements
The development project setup supports two different modes.
The remote project mode requires an existing installation of map.apps.
All required sources, such as map.apps files, are loaded from this installation.
Within the project folder only custom code/layout is maintained.
For installation instructions of map.apps refer to the installation documentation.
Set up the development project
Download the latest release of mapapps-4-developers or a version fitting the targeted map.apps version from https://github.com/conterra/mapapps-4-developers/releases. Extract the contents of downloaded zip file to a folder of your choice (referred to as [project-folder] in the following sections).
If you want to develop in remote project mode (recommended), edit the file
[project-folder]\pom.xml and point the following property to your map.apps remote installation:
<mapapps.remote.base>https://<yourserver>/mapapps</mapapps.remote.base>Create/Update the local Maven repository
The map.apps development project is an Apache Maven project. Maven is a build management tool that maintains external resources such as libraries. Some of these resources are available in globally downloadable resource libraries and some aren’t. For example the Esri Java Script API or the map.apps code aren’t. Thus these files need to be copied manually to the local Maven repository. All these sources are stored locally on your computer for later use.
Maven expects the folder structure .m2\repository in the user’s home directory. Because it is not possible to create folders named with "." via the Windows Explorer, the folder has to be created via the Windows command shell:
> mkdir %USERPROFILE%\.m2\repositoryCopying external libraries
All required libraries are shipped with the map.apps distribution.
Copy the m2-repository folder from the release contents to %USERPROFILE%\.m2\repository on your machine.
Open the project in Visual Studio Code IDE
-
Run Visual Studio Code (VS Code) and click File → Open Folder. Navigate to the folder where mapapps-4-developers was extracted to previously ([project-folder]).
-
Ensure that the map.apps Version of the map.apps Installation matches the <mapapps.version> property in [project-folder]\pom.xml
-
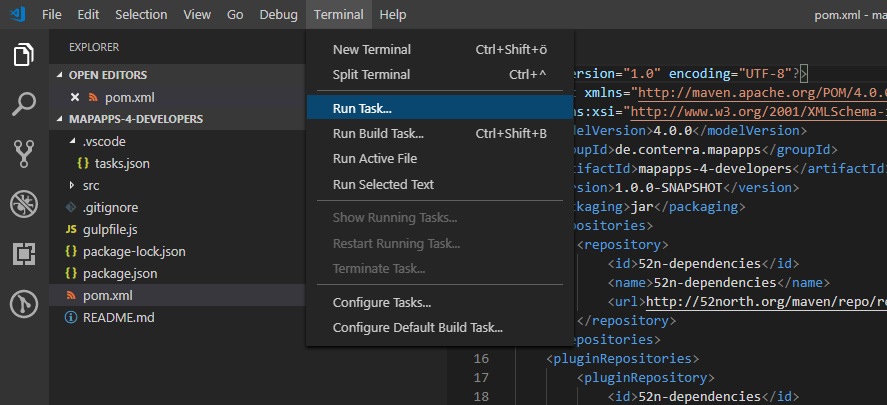
Now the preconfigured jetty server can be started by clicking "Terminal" → "Run Task" → "Run Jetty Server" from VS Code’s top-most menu.
-
The server is running on port 9090 by default. When launching the first time, Maven downloads all required external libraries. When ready the VS Code "Output" console states:
The development project has a second mode (Standalone), where no map.apps remote base is necessary, but all sources are integrated within the project.
This requires to start the server with the profile include-mapapps-deps.
The task "Run Jetty Server" does not have this profile, as it points to mvn jetty:run -Pwatch-all but needs to be mvn jetty:run -Pwatch-all,include-mapapps-deps.
Therefore, another task has to be created.
|
Testing
To check that the server is running properly URL http://localhost:9090 can be opened in a browser: A very basic map.apps application is loaded. Now changes can be made to the app, bundles or layout. These changes are reflected directly and the server does not have to be restarted.
Deployment of bundles
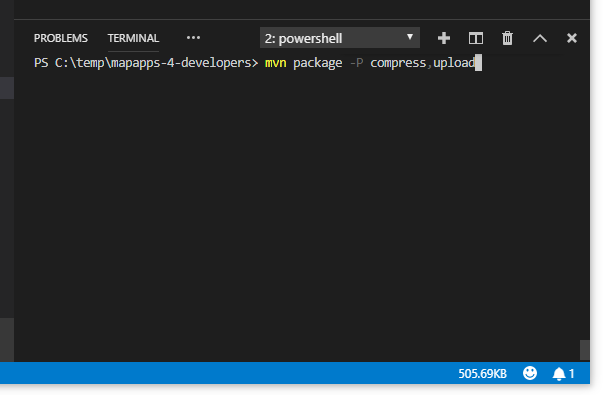
After the development has finished all bundles can be deployed to a map.apps stage or production instance. The project creates a package containing all bundles. To create the file run maven command package and activate profile compress. This performs JavaScript, HTML and CSS code optimization.
mvn package -PcompressAfter the process is finished you find the following file in your project’s target folder ([project-folder]\target):
-
mapapps-4-developers-1.0.0-SNAPSHOT.jar: Archive containing all optimized custom bundles.
Now, these file can be upload manually using the map.apps Manager. After installed the new bundles are centrally available - thus they can be used in any app.
Automatic deployment (optional)
The project also provides a way to deploy apps and bundles. Just add the profile upload to the previous command.
After the process is finished bundles and app are deployed to the configured map.apps remote installation.
In case the map.apps Manager admin username or password have been changed they need to be updated in the pom.xml file of the project. Search for the following properties in file [project-folder]\pom.xml:
<username>admin</username>
<password>admin</password>
For further information refer to Maven Plugins.
Updating the development project to a new map.apps version
Development projects can be easily updated to new map.apps versions.
-
The map.apps remote installation is updated to the new map.apps version.
-
New provided libraries (for example ArcGIS API for JavaScript or map.apps) have to be copied to the local repository (see Copying external libraries).
-
Open file
pom.xmlof the mapapps-4-developers project and set the following properties to the new version strings. -
Perform clean on your project and restart the Jetty server.
<mapapps.version>4.6.0</mapapps.version>
<ct.jsregistry.version>1.2.6</ct.jsregistry.version>
<ct.jsrt-test.version>1.1.5</ct.jsrt-test.version>
Importing existing apps from a map.apps installation
A common way to start developing is to use map.apps Manager and Live Configuration to create and configure a new app first.
After everything is done the app can be imported to the development project.
The app needs to be copied to folder [project-folder]\src\main\js\apps\<your_app_name>\app.json.
All resources (such as images) can be placed in the app’s folder as well.
The app is accessible via http[s]://<your_jetty_server>:<port>/?app=<your_app>.
If you want to integrate own bundles on your app you need to configure the app in a way that it is able to load bundles from two repositories: the local bundle repository with your custom developments and the map.apps remote repository with all existing map.apps bundles.
"load": {
 "bundleLocations": ["localbundles", "bundles"],
 "allowedBundles": ["system", ...
|
This keyword resolves to the JavaScript registry of your development project: http[s]://<your_jetty_server>:<port>/resources/jsregistry/root |
|
This keyword resolves to the JavaScript registry of the map.apps remote installation: http[s]://<your_server>:<port>/mapapps/resources/jsregistry/root |
| The order of the bundle locations is important: map.apps first tries to load the bundles from the first registry. Only those bundles that could not be found are loaded from the second registry. |
In case you upload the app via the map.apps Manager you need to remove the bundleLocations property. When using the automatic deployment this property is removed.