Your first bundle
In map.apps, functions are made available to apps as bundles. So it might not be a surprise that your first extension will be a bundle, too.
What you need
To follow this guide you need:
-
map.apps for Developers set up as described in Set up the development environment.
Step 1: Create a minimal bundle
map.apps for Developers already contains an extension, the sample_camera bundle located in src/main/js/bundles/sample_camera.
As you can see, a bundle is a folder with several files and folders in it, some are optional and some are mandatory.
We are going to add a new bundle called weather in a second.
It will host the code needed to fetch and print the weather data.
Let’s create the weather bundle from scratch and extend it step by step:
-
Open map.apps for Developers in VS Code.
-
Run map.apps by clicking Terminal → Run Task → Run map.apps for Developers from VS Code’s top-most menu.
-
Create the folder
weatherinsidesrc/main/js/bundles.
This is the new bundle folder that will contain all code and all other resources making up the bundle. -
Create the file
src/main/js/bundles/weather/manifest.json.
Every bundle must have amanifest.jsonfile in its top folder. The file contains all the important information about a bundle. -
Open the
manifest.jsonfile, set the following content, and save the file:{ "name": "weather", "version": "1.0.0" }Name and version are the minimum required information for a bundle. Here, we defined that the new bundle is identified by the name
weatherand the version1.0.
Now it is time to check if everything worked out so far.
In a browser open the following URL to list all bundles available in your instance of map.apps for Developers: http://localhost:9090/resources/jsregistry/root.
That’s a pretty long list of bundles!
Every bundle in this list implements one of the many functions that are available in map.apps.
As it is sorted alphabetically, we should be able to find our new bundle by its name weather right at the bottom:
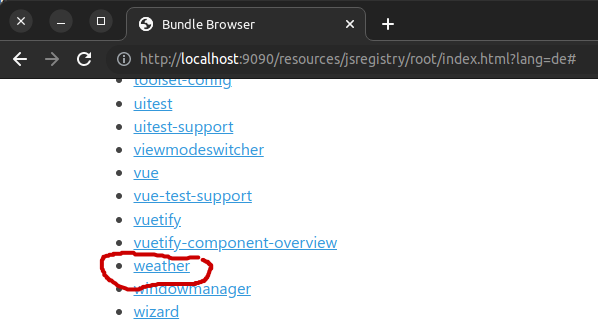
Well, it does not do anything, yet, so let’s…
Step 2: Add some code
-
Create the file
Weather.tsinsrc/main/js/bundles/weather. -
Add the following code to
Weather.tsand save the file.export class Weather { activate(): any { fetch('https://api.open-meteo.com/v1/forecast?latitude=51.96&longitude=7.63¤t_weather=true') .then((response) => response.json()) .then((data) => { console.info("### Your weather service"); console.info(`### Muenster, Germany: ${data.current_weather.temperature} °C`); console.info("### -- Weather data by https://open-meteo.com/," + " offered under the CC BY 4.0 license (https://creativecommons.org/licenses/by/4.0/)"); }) .catch((error) => console.info(`Error requesting weather data: ${error}`)); } }When
activate()is called, we request the current weather information for the coordinates of Muenster, Germany, from open-meteo.com. As soon as the JSON response data is available, we print the current temperature in the browser console. -
After copying the code into
Weather.ts, you need to add an empty line at the end of the file. This is necessary because map.apps for Developers defines rules how source code files must be formatted. One rules states that every.tsfile must end with an empty line. If the empty line is missing, you will get errors when the project is built later own. -
Create the file
module.tsinsrc/main/js/bundles/weather.
This file is necessary to tell the JavaScript module loader which files to load when the bundle is activated. -
Add the following code to
module.tsand save the file:export { Weather } from "./Weather";This will make sure that the runtime environment can find the
Weatherclass defined inWeather.tswhen the bundle is started. -
And again, add an empty line to the end of
module.ts. -
Edit the
manifest.jsonfile, adding the"i18n"and"components"properties like this:{ "name": "weather", "version": "1.0.0", "i18n" : [], "components": [ { "name": "Weather" } ] }
Now that the code is all there, we just need to make sure, it is used in an app.
Step 3: Create the weather app
As the weather bundle is now available in your running map.apps instance, apps can start using it.
We will now create a new app that is supposed to use the weather bundle.
-
In VS Code create an empty file
src/main/js/apps/weather/app.json. -
Add the following JSON to the file and save it:
{
    "load": {
        "bundleLocations": [
            "localbundles",
            "bundles"
        ],
        "allowedBundles": [
            "system@^4.14.1",
            "splashscreen@^4.14.1",
            "templatelayout@^4.14.1",
            "template-seasons@^4.14.1",
            "theme-everlasting@^4.14.1",
            "map-init@^4.14.1",
            "map-preload-2D@^4.14.1",
            "weather@^1.0.0"
        ]
    },
    "bundles": {
        "map-init": {
            "Config": {
                "basemaps": [{
                    "id": "satellite",
                    "basemap": "satellite",
                    "selected": true
                }],
                "view": {
                    "viewmode": "2D",
                    "zoom": 4
                }
            }
        }
    }
}
You don’t need to understand the details of this app configuration. It sets up a very basic map.apps app with a satellite image background. The most interesting part is the list of bundles defined by the
allowedBundlesproperty. This property lists all bundles that an app requires to get loaded when the app is started in a browser. You certainly already noticed, that theweatherbundle is part of the list. Please note, that we are using the exact values of the properties"name"and"version"defined in themanifest.jsonfile of the weather bundle. Name and version are separated by a@, and the version is prefixed with a^.
Step 4: Action!
Now we are going to check, if the "weather" app works a expected.
-
Load the following URL in a browser: http://localhost:9090?app=weather.
-
Open the browser console by pressing Ctrl+Shift+J.
-
Watch the console while the weather app is loading. It will generate plenty of log lines, but eventually it will print out the weather data as expected like this:

Recap
In this tutorial, we…
-
… created a bundle called
weatherto host functionality for a weather service. -
… browsed the list of all bundles available in map.apps for Developers to find the new
weatherbundle. -
… added the operational TypeScript code to the file
Weather.ts. -
… added the some mystical lines to the files
module.tsandmanifest.json.
See What does actually happen here?, right after this recap, for some more details. -
… referenced the bundle in the new weather app.
-
… loaded the weather app to check the browser console for the expected output.
That was a lot.
Maybe you want to know a bit more about the mystical lines you added to module.ts and manifest.json.
If not, have a look at the next steps.
What does actually happen here?
After adding the code to Weather.ts we also edited module.ts, manifest.json, and app.json.
How are these files related?
This is a rough description of what happens, when the weather app is started by map.apps:
-
map.apps loads every bundle listed in the property
allowedBundlesofapp.json. So, map.apps loads theweatherbundle, too. -
map.apps reads the
manifest.jsonfile of theweatherbundle. -
map.apps loads the
modules.tsfile of theweatherbundle.
This exports theWeatherclass of theWeather.tsfile. -
For any
componentsentry in themanifest.jsonfile, map.apps tries to activate the component, that is:-
map.apps tries to find a class within this bundle that matches the
nameof the component (Weather). -
map.apps instantiates the class.
-
map.apps calls
activate()on the instantiated class.
-
The last step will execute the code that requests the current weather data from the open-meteo web service.
Some things to remember, but don’t worry if your memory is overloaded:
-
A bundle cannot only declare one but an arbitrary number of components in its
manifest.json. Actually, most bundles declare more than one component. -
A
module.tsfile can export more than one class from any number of modules (TypeScript or JavaScript files) available in a bundle. -
Components defined in the
manifest.jsonfile are the building blocks of map.apps bundles. In this tutorial we just used the very most simple form of them. If you dare, take a look at the components reference documentation.
Next steps
You just created a new bundle in a development environment provided by the map.apps for Developers project. Well…, that means that the bundle can be used by the weather app in your development environment.
Typically you want to deploy the bundle to a central map.apps instance, where all the "real" apps of your organization or project are hosted.
And they are waiting to finally use your weather bundle!
In Deploy a bundle to a map.apps instance we will explore the different ways to make a bundle available on another map.apps instance.