Installation
Overview
security.manager NEXT consists of the following components:
-
security.manager NEXT SOI, an ArcGIS Server extension to enforce policies on ArcGIS Server services.
-
security.manager NEXT Manager UI, a browser application to manage the SOI extension state and applied policies.
-
security.manager NEXT CLI, a command line tool to easily manage state and policies for multiple services.
To get started with security.manager NEXT you at least need to install the SOI and the Manager UI. Installing the CLI is not required but recommended if you want to manage more than just a handful of services or automate the policy management.
Preparing the installation
Before installing the security.manager NEXT components, unzip the installation file security.manager-NEXT-<version>.zip into an arbitrary folder.
This will create the folder security.manager-NEXT-<version> that will be referred to as [SECMAN-DIR] in these docs.
|
Configuring ArcGIS Enterprise URLs
When installing security.manager NEXT or using the CLI you sometimes have to specify the "base URL" of an ArcGIS Enterprise Portal or ArcGIS Server instance.
We recommend to use the direct URL If you instead want to use the Web Adaptor URL for ArcGIS Server, like |
When done, proceed with the installation of the SOI extension.
Install SOI
To install the SOI you need to upload two .soe files to ArcGIS Server:
-
Sign in to ArcGIS Server Manager and navigate to the Site section.
-
Click Extensions → Add Extension to upload both
.soefiles from[SECMAN-DIR]. -
Copy the license file to the ArcGIS Server host:
-
Windows: Copy the license to
C:\arcgisserver. In case the folder does not exist, copy the license to the folder configured in theAGSSERVERenvironment property. -
Linux: Copy the license to
${AGSSERVER}/usr/.
-
Install Manager UI
Register at ArcGIS Enterprise portal
The Manager UI has to be registered as a web application at the ArcGIS Enterprise portal to make use of the portal’s single sign-on feature. Follow the next steps to register the application:
-
Log in to portal as a privileged user.
-
Switch to tab Content.
-
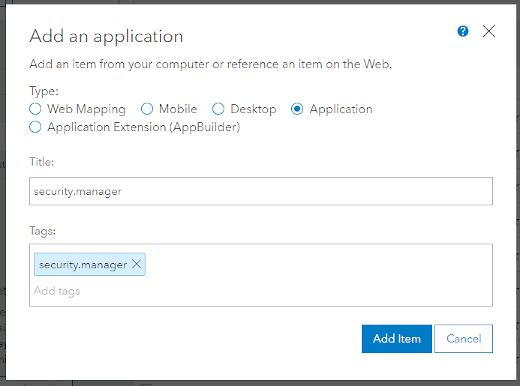
Click Add Item → An application.
-
Use the following settings:
-
Type:
Application -
Title:
security.manager -
Tags:
security.manager
-
-
Click Add Item.
-
The overview for the new portal item "security.manager" is displayed.
-
-
Click Settings and go to section Application.
-
Enter in URL:
https://<tomcat-host>/secman-nextreplacing<tomcat-host>with the actual hostname and port. This will be the URL to the application. -
Click Update to set the registration settings.
-
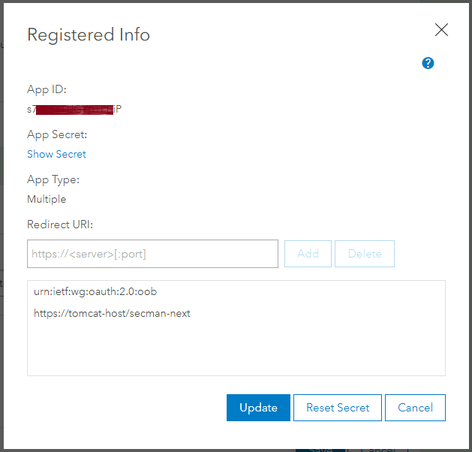
As Redirect URI, please enter:
https://<tomcat-host>/secman-nextreplacing<tomcat-host>with the actual hostname and port. -
Click Add to add the URI to the list of valid redirect URIs.
-
Store the App ID somewhere — it will be needed during the configuration of Manager UI web application.
-
Click Update to close the dialog.
-
-
Click Save to confirm the changes made in the application settings.
URLs should start with https:// to ensure that secret tokens are always sent over a secure channel.
|
Deploy to Tomcat
-
Make sure that the Tomcat service is started.
-
Deploy the Manager UI web application by copying
[SECMAN-DIR]/secman-next.warto[TOMCAT]/webapps.Alternatively you can use the Tomcat Manager to deploy the WAR file.
Configure application
Before you can use the Manager UI you need to edit some configuration settings. Otherwise you won’t be able to login to the application.
To configure the Manager UI follow these steps:
-
Copy the template config file
[SECMAN-DIR]/resources/application.propertiesinto the folder${user.home}/.secman-next/.${user.home}refers to the home directory of the user running the Tomcat service.If the Tomcat server does not run under a dedicated user, it runs as "Local Service". In this case the directory is created under the following path:
%systemroot%/ServiceProfiles/LocalService/.secman-next/.To change the location of the
application.propertiesfile, edit the value ofdata.directory.locationin[TOMCAT]/webapps/secman-next/WEB-INF/classes/custom-application.propertiesas described in the configuration reference. -
Edit the new, copied
application.propertiesfile and adjust the following values:-
policyManagement.arcgisServers -
policyManagement.portalUrl -
security.authn.oauth.clientId
The properties are described in the configuration reference.
-
-
Restart Tomcat so the modified configuration is read.
Install CLI
You have got two options to install secmanctl.
Either you directly use the executable shipped with security.manager NEXT or you install the tool from the npm registry.
Install from shipped executable
secmanctl is shipped as an executable file for Windows and Linux operating systems (x86-64 architecture).
It is located at
-
[SECMAN-DIR]/cli/linux_x64/secmanctlfor Linux. -
[SECMAN-DIR]\cli\windows_x64\secmanctl.exefor Windows.
The directory containing the executable can be copied to another location.
Files located next to the executable may be required by secmanctl at runtime and should be included when copying the binary.
You should add the location to your system’s search path ($PATH or %PATH%, for example) so you can run secmanctl without having to specify the full path to it.
Depending on your operating system, it may be necessary to grant executable permissions to the secmanctl binary.
Install via npm
secmanctl is also available as a package in the public npm registry.
To install secmanctl on your system, you need to install Node.js (and npm) if it is not already installed.
|
System requirements
For using
|
Install the command line tool and register it as a global executable on your system by running:
$ npm install @conterra/secmanctl -gVerify the installation by executing the following command:
$ secmanctl --versionAfter the installation
After finishing the installation you can:
-
"Get started" with security.manager NEXT by protecting a service by example.
-
Learn more about "managing access policies".