The Five Steps of Creating a Policy Set for a WMS
1. Creating the policy set and loading the resources
Open the Administrator and select the Policies tab. In the tree, select WMS and then Create New Policy Set.
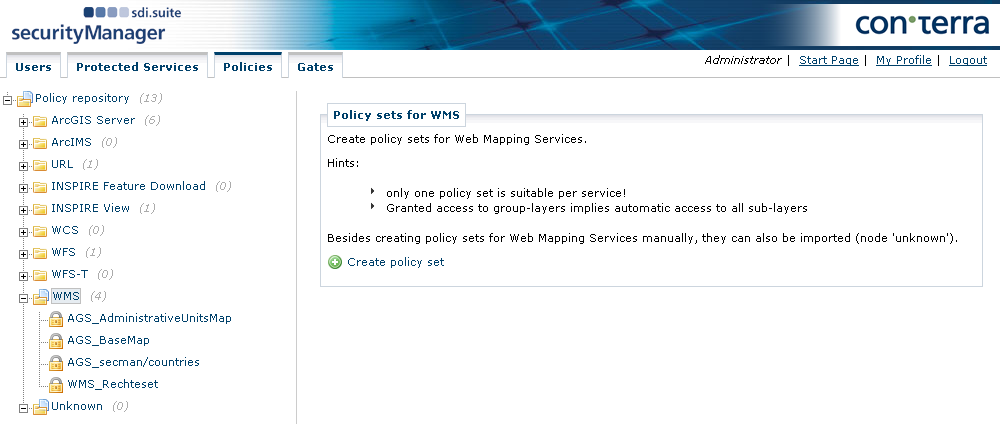
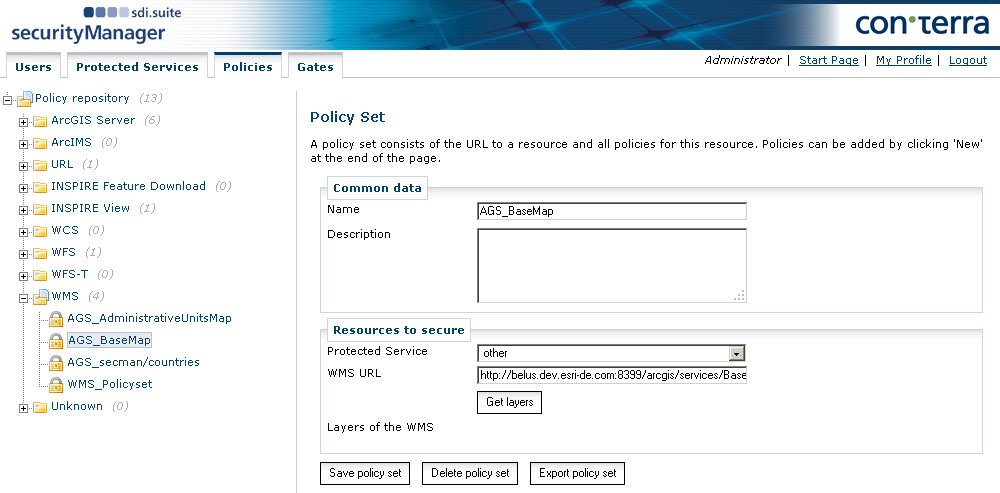
Specify a title and give a description of the policy set of the WMS to be protected in the following dialog. The title is listed in the policy repository tree to aid the rapid location of a policy set for a particular service. The description is used to provide information about the purpose of the policy set. Select the service from the Protected Service box that you previously configured in the Protected Services tab. Alternatively, select Others in the selection box and manually enter a URL in the WMS URL field.
Click Get Layers. This causes a GetCapabilities request to be sent to the service. If successful, the service is loaded (via its URL) together with its layers as resources. The policies created subsequently can refer to these resources. An overview of available resources (layers) is then displayed along with the means of creating and editing rights to this service.
| It is urgently recommended that only one policy set is created for each protected service, because the existence of several policy sets per protected service can lead to unexpected program behavior. For this reason, security.manager displays a warning if any attempt is made to save a policy set for a service for which another policy set has already been defined. Despite this, however, security.manager does allow several policy sets to be defined for each service. |
2. Defining unrestricted access for the role 'Internal'
For this example, it is necessary that the role 'Internal' has been created in the user manager and that it has been assigned to at least one user.
To create a policy within a new policy set, click New in the Policies area. In the dialog that appears enter a name and a description for the newly created policy. It is recommended to choose names that make it immediately apparent who is permitted to access which resources with this policy, for example "Internal_allowed_all" or "External_allowed_all_except_GetFeatureInfo". To give a more detailed description of the policy, you can also use the Description field.
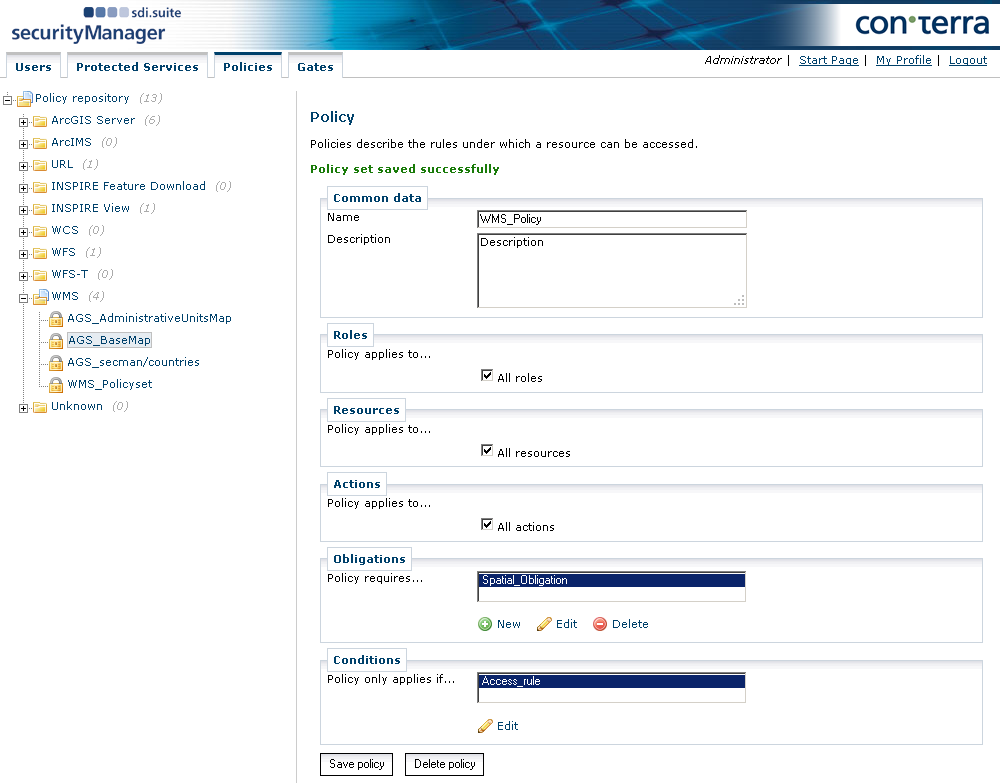
The first thing to do is to lay down the roles to which this policy applies. If the All Roles checkbox is not selected, the available roles are displayed.
The next step is to define the resources of the secured service to which this policy applies. If All Resources is selected, no restriction is made to resources, and the individual layers are not displayed in the Administrator interface. If the All Resources checkbox is not selected, the individual resources are displayed and can be selected individually. Note: The URL of the secured service is part of the resources for all types of policy sets. If you do not include this resource with your selection, access to the service is rejected outright.
Now define the actions for which this policy applies. The actions available generally correspond with the operations that can be performed on services of this type. In the case of WMS, these are GetMap, GetCapabilities and GetFeatureInfo. To grant the right for all or for individual actions, select the corresponding options.
In the Obligations section, you can specify the obligations to which the policy is applied. To define the drawing of a copyright notice, see the following step on the creation of a second policy in this policy set. To define spatial obligations, see Creating policies with spatial authorization.
Under Conditions you can restrict the policy in such a way that it is only valid within a certain time interval.
By clicking Save policy, the policy is added to the policy set and saved in the policy database. From this moment on, it is included in all policy decisions made by the PDP.
3. Defining restricted access policies for the role 'Guest'
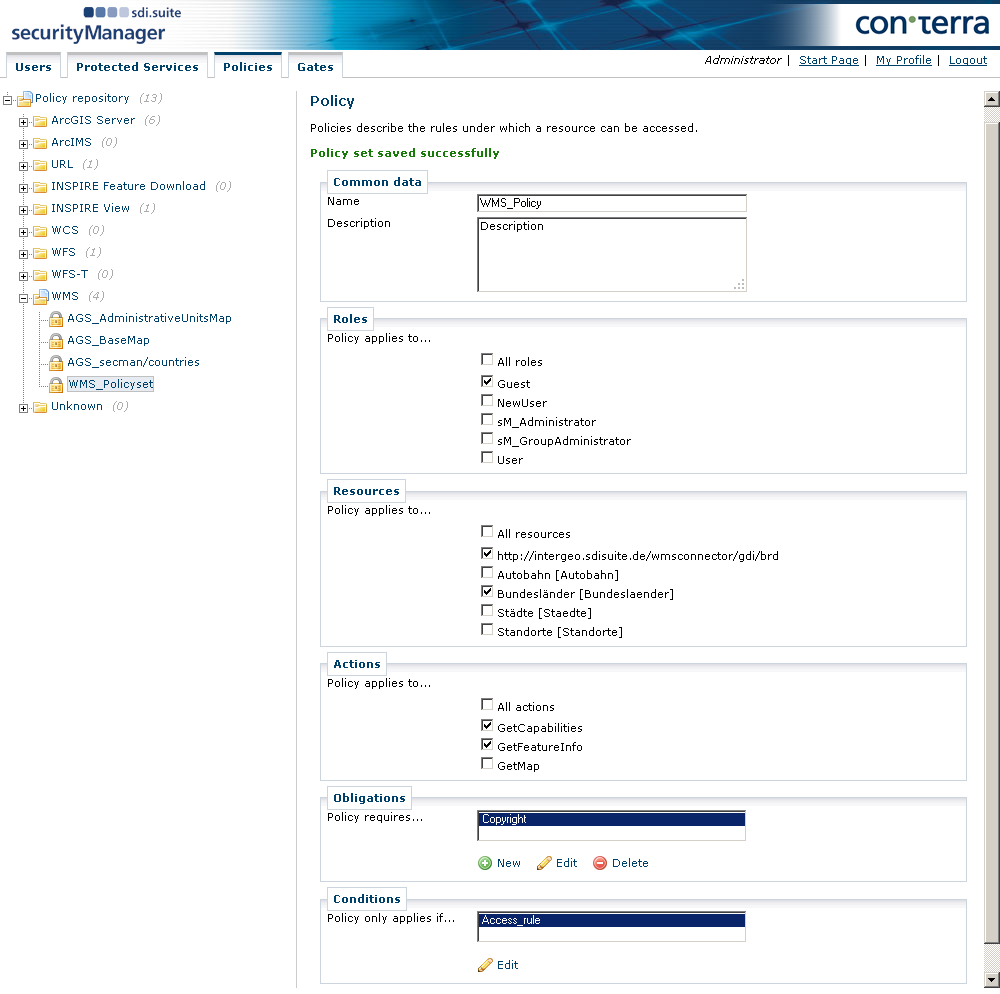
The role 'Guest' is created in security.manager by default. All guest gates are mapped onto this role. Select the newly created policy set and click New underneath Policies to create a new policy. In the dialog that follows, enter a name and description as explained before.
The following section describes how to define a policy for all users of the role "Guest".
-
The service can be loaded and displayed on maps, as can the "Bundesländer"' (federal states) and "Kreise" (counties) layers.
-
The feature request (GetFeatureInfo) is not permitted.
-
Use is limited to the period Jan 1st, 2012 till Dec 31st, 2012.
-
A copyright notice is to be included on all map graphics.
To implement this, the following values must be configured:
-
Roles: Selection of guest role
-
Resources: This is where the URL of the service is selected, along with the "Bundesländer" and "Kreise" layers. The Layer ID is given in square brackets.
-
Actions: In the preceding example, only "GetMap" and "GetCapabilities" are selected, because "GetFeatureInfo" is not permitted.
Under Obligations a copyright notice saying "(c) by con terra" is defined. If the WMS is based on an ArcGIS Server, it is possible to restrict the displayed features by using a filter (definition query). It is recommended that you create the definition query with the Query Builder ArcMap.

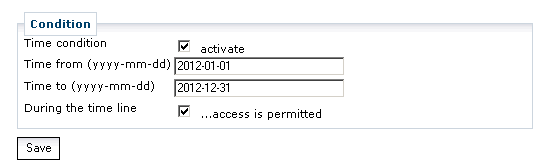
Under Conditions, the entry is modified and additionally the usability is restricted in time. The date must be specified in the form YYYY-MM-DD (for example 2010-01-10 for January 1st, 2010).
Now save the policy by clicking Save.
4. Define order of policies
It is possible for a user to belong to more than one role. In the preceding example, Mr A is assigned both the "Guest" and the "Internal" role. The order of the policies in the policy set determines which role is applied. When a policy decision is being made, a search is made from top to bottom through the individual policies of the set, until an appropriate policy is found that permits access. Any subsequent policies which allow access to additional resources are not taken into account. For this reason, it is important to ensure that the policy with the greatest value is the first in the list.
To change the order, use the arrows to the right of the policy list. When any changes are made to the policy order, it is necessary to save the policy set.
5. Additional information
-
Policies can be combined:
To create more complex security configurations several policies can be combined. For example, if a security configuration is to be defined that only permits GetFeatureInfo only on layer A, but allows GetMap and GetCapabilities on all layers, it is necessary to create two policies:-
Policy 1: Irrespective of the resource, GetMap and GetCapabilities are both permitted for role X.
-
Policy 2: For layer A, GetFeatureInfo is permitted for role X.
-
-
Accessing non-permitted resources:
In general, form policies in a way that clients are prevented from placing queries containing non-permitted resources. In the case of a WMS, this means that as soon as access is not permitted to a layer via GetMap, access via GetCapabilities is also not allowed. Clients that react dynamically to the layers contained in the Capabilities document and which offer these for display in a map are then prevented from displaying layers that are effectively unusable. However, in certain cases, it might be desirable for some layers not to appear in the Capabilities document although clients with knowledge of their existence are still able to access them. All interceptors of the security.manager are generally implemented in such a way that a request or response that demands access to unauthorized resources are modified so as to allow these resources to be filtered out. The client only receives an error message to the effect that it is not in possession of sufficient rights, if no authorized resource remains in the request or the response. -
Hierarchical resources (layers): The Administrator application lists layers and feature types in a non-hierarchical list. A WMS allows to organize the contained layers in a hierarchical structure. If you assign a policy to a layer having child layers, access is released to all the child layers, irrespectively of whether these layers have been blocked or not.
Importing and exporting policy sets
The Export button on each policy set can be used to export the set as an XML file. An import function is available for all policy sets via the Unknown node (including those for which the Administrator application has no maintenance dialogs).
Unknown policy sets
As shown preceding, security.manager Administrator arranges policy sets in accordance with known (and installed) types. For each service type a plug-in defines the dialogs for maintaining the policies for those services. Additionally, other policies can also be maintained (so-called "unknown" policies, because the Administrator application has no plug-in for these types). However, the maintenance options are then restricted to importing and exporting and the possibility of maintaining the content via an XML view.
Important note: Incorrectly configured policy sets can adversely affect the functioning of the PDP service or even prevent it from running. Modifications in the XML view should therefore only be performed by experienced administrators.